How I made my little roundhouse
An overview of the building process, materials used, and what it cost
Introduction to simplicity
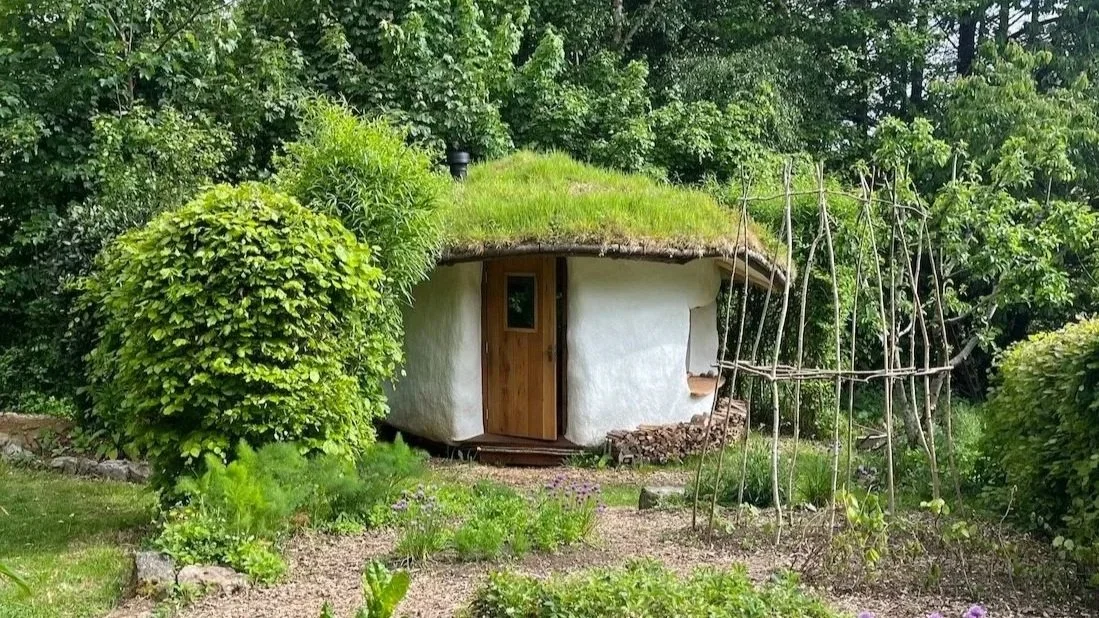
My little roundhouse was built using a recipe developed by Emerald at Tir Ysbrydol in West Wales, who came up with the design in response to a beautifully practical question: how can we create a small home that is inexpensive to build, comfortable enough to live in throughout the year, resilient enough to withstand the British weather, and as gentle on the earth as possible?
She’s been living in the the kind of simple structure she developed from that brief for over 20 years now, and I honestly have never met anyone who loves their home more than she does.
Since learning the process from her (you can see one of the huts I built and lived in on Emerald’s land here), I’ve now been around 15 of these structures, gradually refining certain details through my own experience, but essentially remaining true to her core design.
This document isn’t intended as a step-by-step building guide. (Hopefully I’ll publish one of those eventually.) It’s a basic overview of the build process, the main materials used, and what it cost.
The building process
I’ll take it from the ground up.
The platform
The body of the building sits on a raised timber platform supported on stone feet. I used slate for these feet, which doesn’t wick moisture upwards as other types of stone do.
Lifting the structure clear of the ground keeps the timber dry, minimises disturbance to the site, and creates a simple, stable, no-dig foundation.
3x8” joists sit on the stone supports to form the frame of the circular platform.
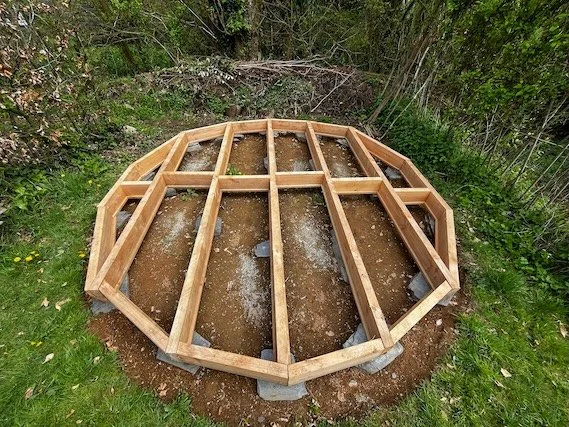
The framework of joists with battens in place ready to take the subfloor boards
Woodfibre boards are suspended between the joists on battens, and then the cavity filled with loose cellulose insulation.
Plywood sheeting then goes down on top of the joists, before floorboards are laid over the top, overhanging the edges of the joists by an inch or so all around.
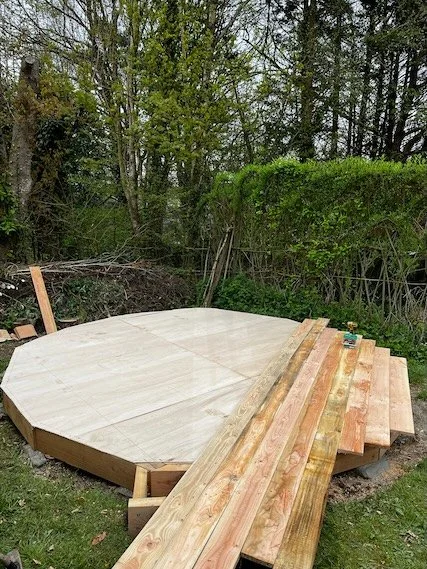
Plywood sheeting being covered by the floorboards. The boards will later be trimmed into a circle.
The straw bale wall
Once the platform is complete, the walls are built from small straw bales laid in circular courses.
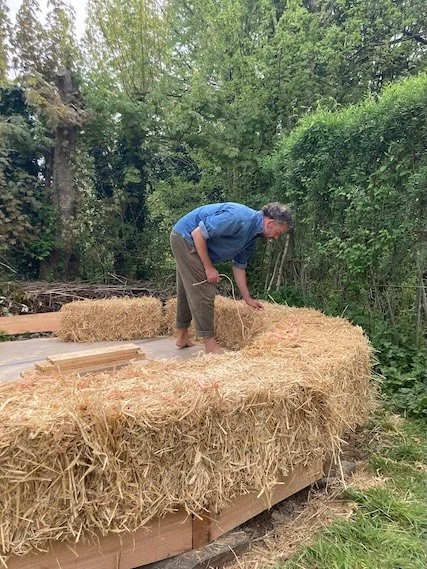
Laying the first course of bales. Notice how the bales overhang the platform slightly, ensuring that any rain that hits the finished walls drips off rather than running onto the platform
Openings are left for the door and 3 windows as the wall rises.
Adjacent bales are tied together at their strings, and from the third course upwards, long hazel rods harvested from local hedgerows are driven vertically through the bales to pin them together.
In total, around 55 bales went into the wall, and around 60 hazel poles.
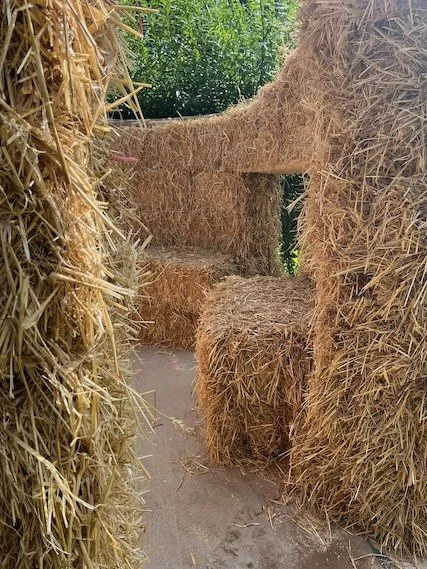
Fluffy golding building blocks!
Door and windows
Four thick wooden timber lintels carry the weight above the openings—one above the door and three above the windows.
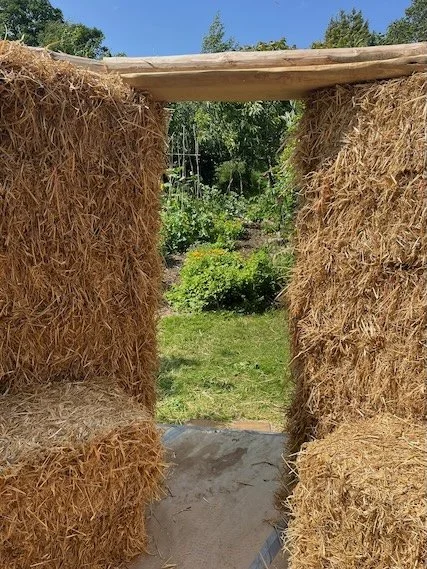
The doorway with lintel above, before he door frame went in
The door itself was handmade by a local carpenter from sawn oak.
Two of the windows use double-glazed units set within the straw walls and plastered in at the edges. Cleft sweet chestnut was used at the top and bottom of the window panes to help secure and frame the glazing within the bale wall.
The other widow is set into a wooden frame, and can be opened.
The door frame, threshold step, and all the window sills are all of oak.
The roof structure
The roof structure is built from sweet chestnut roundwood.
First, a circular wall plate sits on top of the straw bale wall, supporting a reciprocal roof frame.
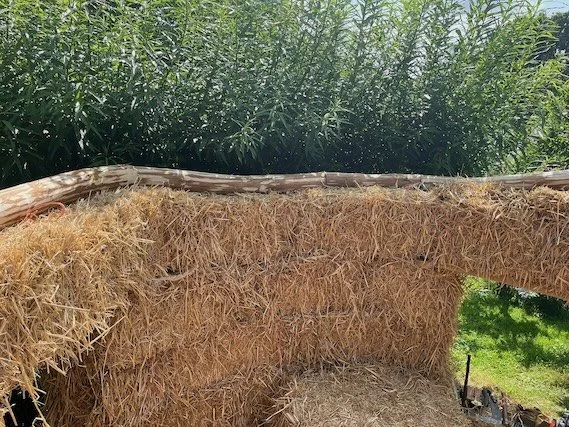
The wallplate is roughly jointed and fixed with timberlock screw
The reciprocal roof sits on top of the wallplate.
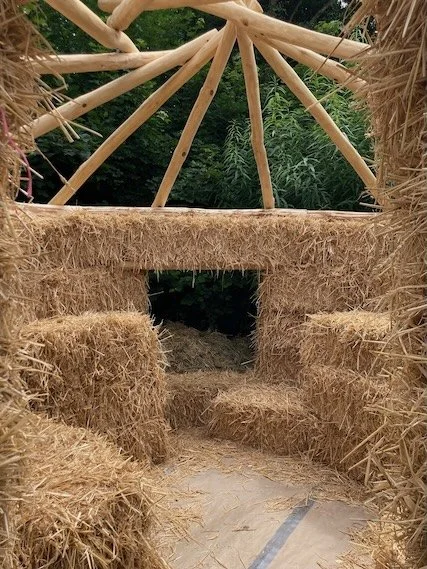
There are 11 main rafters in total
Between the rafters, smaller pieces of split sweet chestnut form a web that supports the layers above.
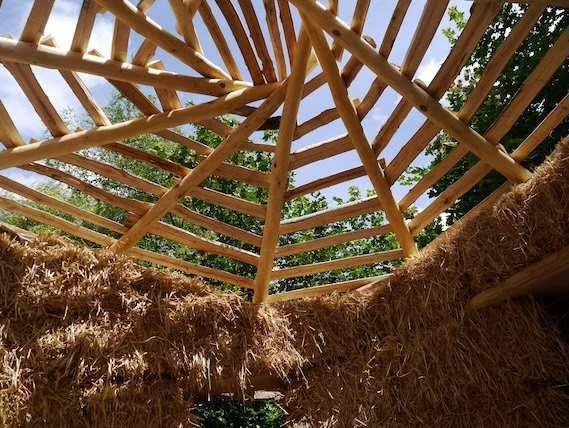
It’s almost a shame to put the rest of the roof on!
Once the timber structure is complete, chicken wire is fixed beneath the roof web to support the straw insulation above and to give the ceiling plaster something to hold on to.
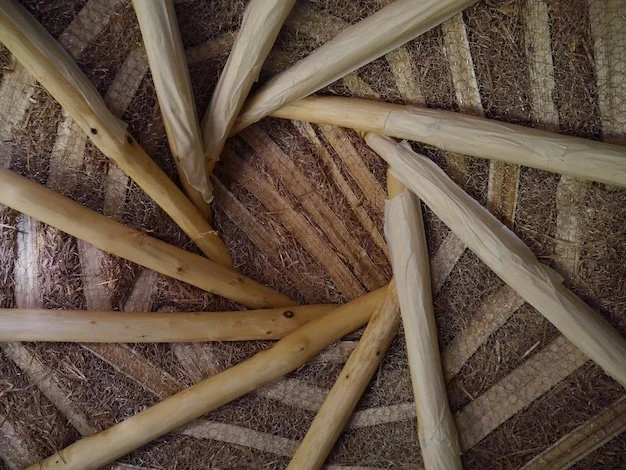
I’d started covering up the rafters with masking tape here, ready for plastering
A light straw-clay mixture is then spread onto the roof structure, followed by a thick layer of straw to act as roof insulation.
Over the insulation goes a heavy-duty rubber pond liner.
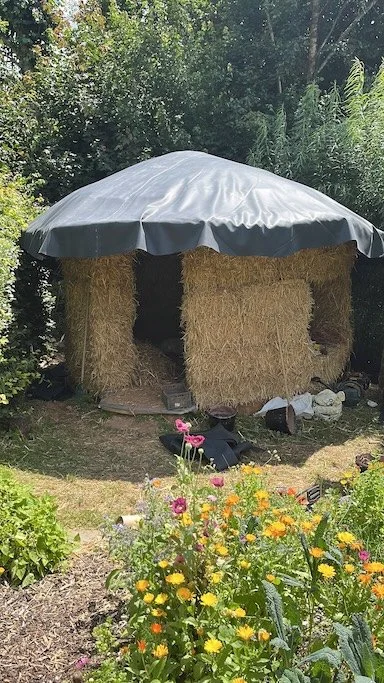
One of the least appealing stages of the whole build!
Finally, turf lifted from elsewhere on the site is laid over the waterproof layer.
It doesn’t take long for the green roof to settle in and for the little hut to become part of the surrounding landscape.
Finishing
The bale wall is first trimmed with a hedge trimmer to remove loose straws, and then coated with clay slip, sprayed on with an air compressor and hopper. This really helps the plaster stick to the straw.
The initial plaster coat was mixed on site using clay, sand and chopped straw. This first coat covers the surface of the bales inside and out.
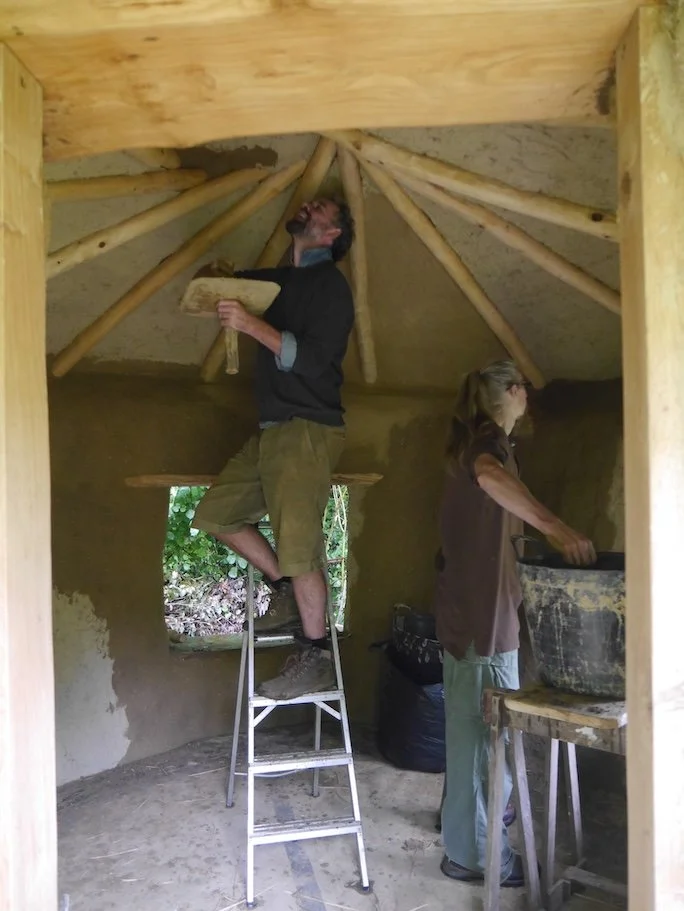
My friend Alim helped a lot during the plastering – thank you Alim!
Internally, the second coat inside used a prepared clay plaster to create a finer finish, and then was painted with clay paint. Externally, the second coat was of lime render, followed by a coat of limewash.
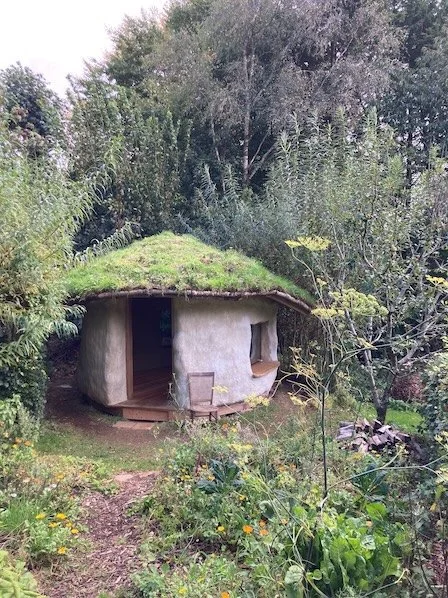
Nearly there at this point. It feels so good to he the roof on and the walls protected
Fireplace
The stove is based around a small clay chimenea, with a metal flue forming the chimney. Chicken wire was wrapped around the chimenea and flue, and then covered with several coats of clay plaster and finally painted.
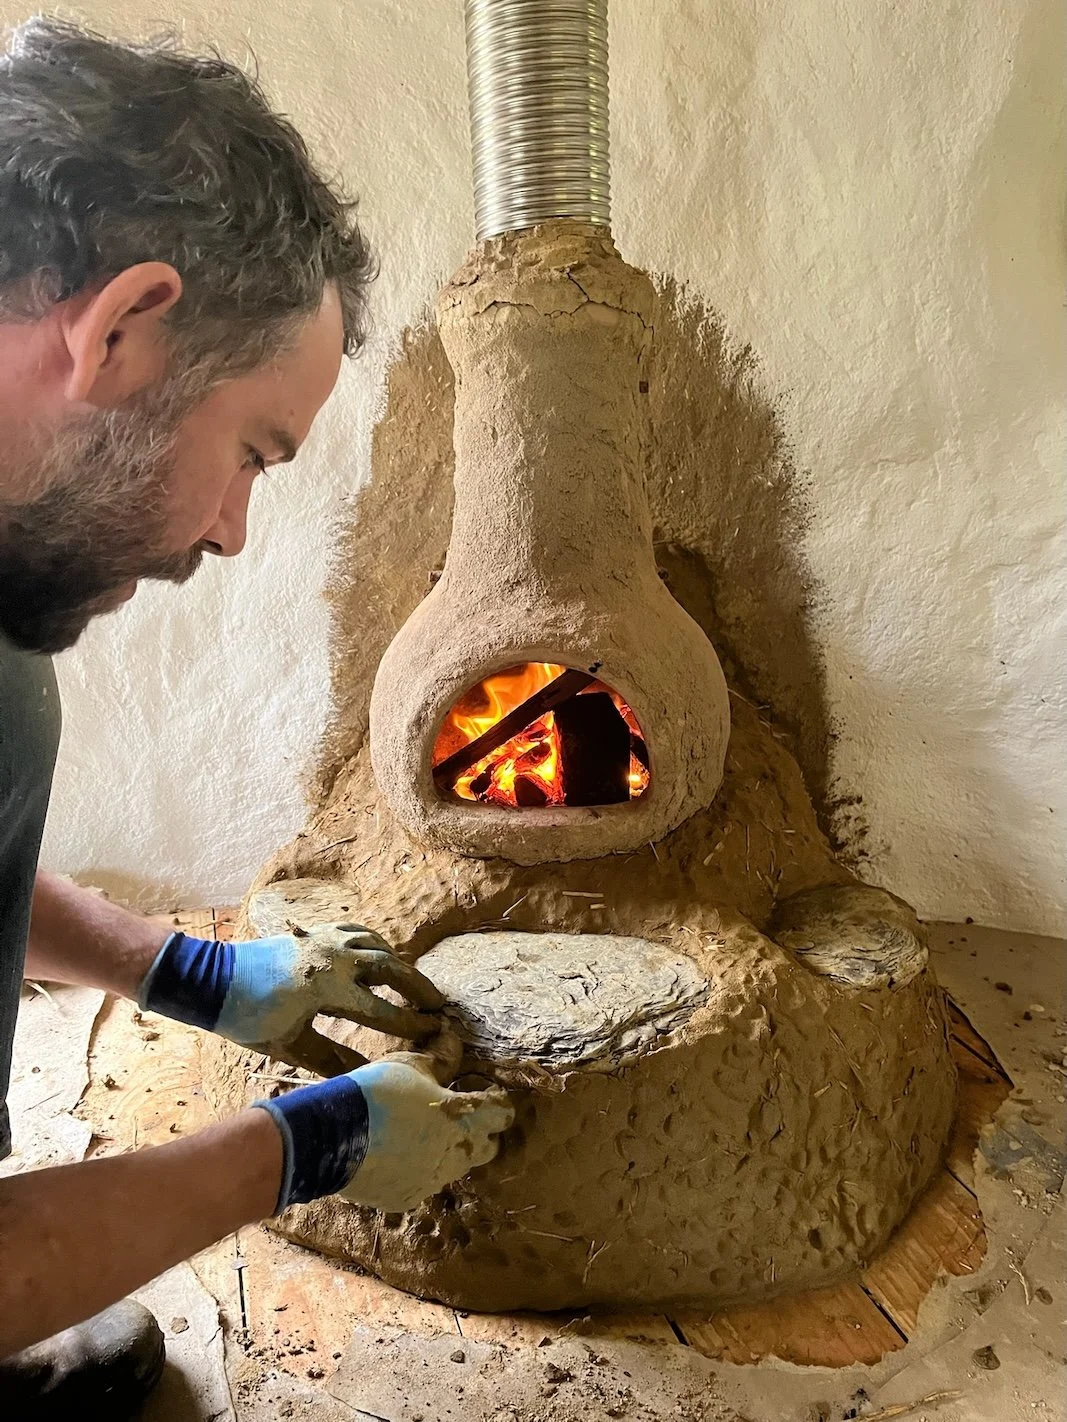
I was lighting the fire while building it to help the cob dry out
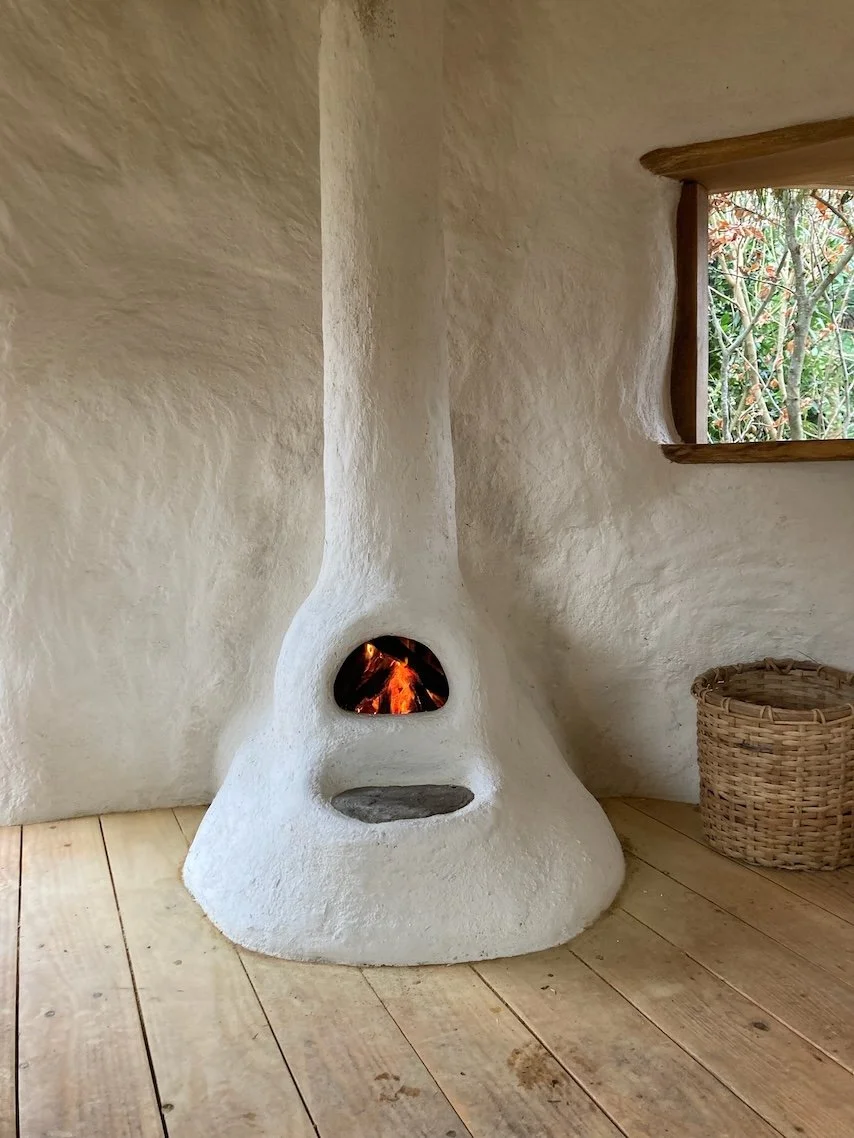
So happy with how the fire came out, although I’d make the opening bigger and try to make the base more elegant next time
And that’s pretty much it.
The last thing was hanging the door and fitting the opening window.
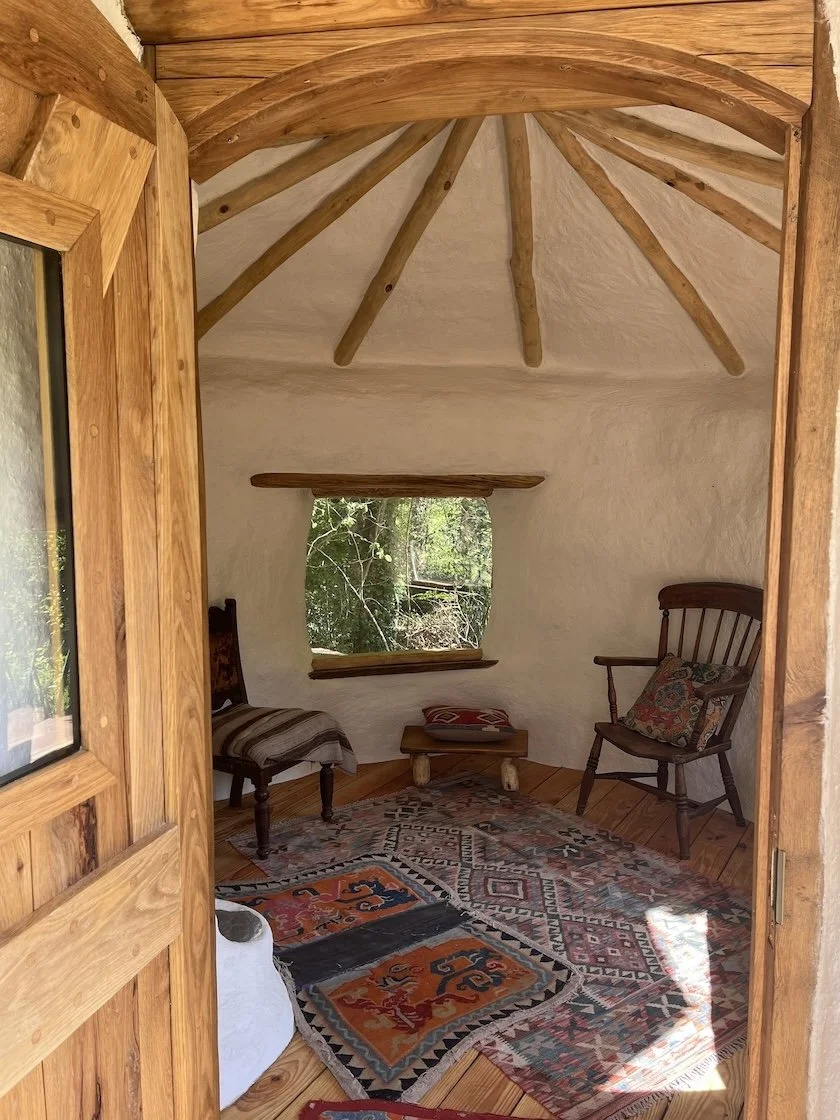
The carpenter who made the door did such a great job
Build time
I’ve built these before in just a couple of weeks, but this one took nearly a whole year! That was mostly due to budgeting issues though.
With a proper budget, good organisation, and a willing team of 5 or 6 people, it’s absolutely possible to get the entire structure built, the turf on, and the first coat of plaster applied in well under a month.
Materials list
The overwhelming majority of the building consists of simple, natural materials:
stone
timber
sweet chestnut poles
oak slabs
straw
hazel
clay
sand
lime plaster
cellulose insulation
slate
turf
Most materials were purchased, while others came directly from the land itself. The hazel rods were cut from nearby hedgerows, the turf came from the site, and some of the clay used in the plaster was sourced locally.
The pondliner and double glazed window units are the main industrial elements. Hopefully soon someone will invent hemp plastic pondliner!
Cost
The total construction cost was approximately £7,500.
Very roughly, that breaks down as follows:
Insulated timber platform: ~£2000
Walls, doors, windows and finishes: ~£3000
Roof: ~£2,000
Fireplace and flue: ~£500
These figures include purchased materials, delivery costs, and the cost of the door being made by a local carpenter.
An evolving design
This roundhouse incorporates a number of small refinements that have emerged through successive builds, while remaining true to the simple and elegant design that Emerald first developed at Tir Ysbrydol.
One of the things I appreciate most about this design is that it isn’t fixed. Each build becomes an opportunity to simplify a detail, improve a feature, discover a better material, or learn some new approach that can be carried into the next one.
I hope this is only the beginning.
The same underlying principles used in this design can easily be adapted into larger structures, including multi-circle dwellings comprising a living room/kitchen circle plus an adjoining bedroom circle.
My own main interest lies in exploring how this simple building language might contribute to the creation of thriving land-based communities in the years ahead.
Kitchen and bathroom
Having finished the roundhouse, I’m in the process of building a compost loo, outdoor shower, and kitchen for it. I’ll post an update when those are finished.
Want one of your own?
If you’d like one of these lovely little buildings for yourself, I’d be glad to explore ways I might be able to help. Depending on where it’s going and what it’s for, I can offer consultancy packages, a done-for-you service, or collaborate with you to put on a community build or a paid course. Feel free to get in touch with me by email at james@landbasedliving.com to start a conversation.
